How to Choose the Right Inner Tube for Your Tire?
Choosing the right Inner Tube For Tire is more important than matching a diameter on a package. A poorly fitted tube can twist, pinch, or lose air during an ordinary ride. I have seen riders replace a punctured tube, only to discover that the new one had the wrong valve or width. The mistake looked small. It was not.
This guide explains how to read tire markings, measure wheel size, and compare tube dimensions accurately. You will learn when a standard tube is suitable and when a self-sealing or heavy-duty option makes more sense. Valve type matters too. Schrader and Presta valves require different rim holes and pumps. Check the rim before ordering. Manufacturers’ specifications remain the most reliable reference.
Riding conditions also influence the decision. A commuter carrying a loaded bag may need different protection from a weekend cyclist using smooth pavement. Gravel, heat, low pressure, and sharp debris can all affect tube performance. Installation deserves equal attention. Inspect the tire’s inner surface, remove spoke-related hazards, and inflate gradually. A little air helps the tube take shape without folding.
The process is not always tidy. Even experienced riders occasionally miss a tiny thorn or overinflate a replacement tube. That is why careful inspection matters more than confidence. With the correct size, valve, material, and pressure range, your tube can support safer, smoother riding. The goal is not simply to buy a replacement. It is to choose a dependable match for the tire, wheel, bicycle, and real conditions.
Identify Your Tire’s Size and Valve Type
How to Choose the Right Inner Tube for Your Tire?
Identify Your Tire’s Size and Valve Type
Read the tire’s sidewall before removing the old tube. You may see markings such as 700 x 32C, 26 x 1.95, or 27.5 x 2.25. The first number usually identifies the wheel diameter, while the second indicates tire width. Match both measurements carefully. A tube that fits the diameter may still stretch poorly inside a wider tire. That can cause folds, weak spots, or repeated punctures.
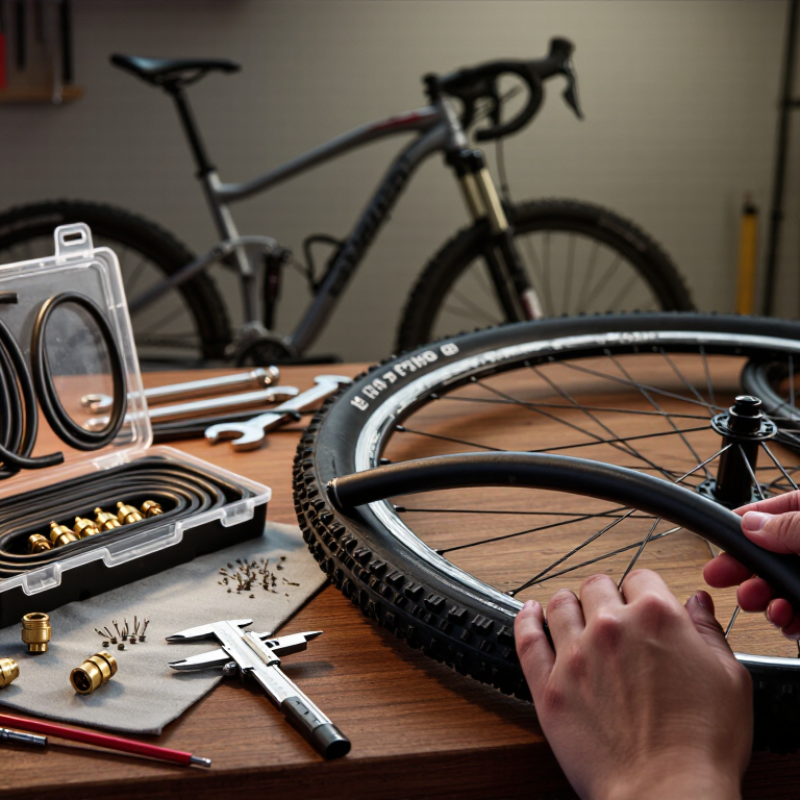
Check the valve before buying. A narrow Presta valve suits a small rim hole and often includes a threaded locknut. A wider Schrader valve matches the hole commonly used on utility bicycles and many larger wheels. Some rims use a Dunlop-style valve, although it is less common in certain regions. Measure the visible valve length too. Deep rims may need a longer valve stem. It should extend far enough for the pump head to attach securely.
If the sidewall marking has faded, inspect the old tube for printed measurements. You can also measure the tire’s bead seat diameter and width, but this requires care. I once relied on a rough width estimate and created unnecessary trouble. The tube seemed close, yet it pinched during installation. Avoid guessing when possible. Place the tube beside the tire, check its label, and confirm that the valve passes cleanly through the rim hole. A correctly sized tube should lie smooth, without twisting or bunching.
How to Choose the Right Inner Tube for Your Tire?
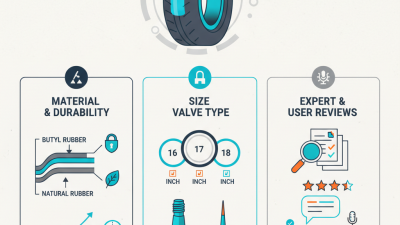
First, read the size printed on the tire sidewall. The ETRTO code gives the tire width and bead seat diameter in millimeters. Match both dimensions when selecting an inner tube.
The valve must also match the rim. Presta valves are narrow and common on road and performance bicycles, while Schrader valves are wider and commonly used on mountain, hybrid, and utility bicycles. Choose a valve length that extends sufficiently beyond the rim for easy inflation.
Choose the Correct Tube Material and Construction
Choosing the correct inner-tube material starts with your riding conditions.
Butyl rubber remains the practical choice for commuting, touring, and everyday repairs. It is affordable, widely available, and holds air steadily. Natural latex is lighter and more elastic, which can improve comfort on rough roads. However, latex loses pressure faster. A 2022 review in Polymer Testing reported that latex compounds generally offer higher elasticity than conventional butyl compounds, but they also require closer pressure monitoring.
Construction matters as much as material.
A standard tube works well for normal road use, while reinforced tubes suit gravel, cargo bikes, and heavier riders. Thicker walls can resist pinch flats, yet they add weight and may feel less responsive. Lightweight tubes save rotating mass, but careful installation becomes essential. One small fold under the tire can create a failure point. I have made that mistake.
Valve design also affects reliability.
Match the valve type and length to the rim, then check the pressure range printed on the tire sidewall. ISO 5775-1:2023 provides dimensional guidance for bicycle tires and rims, helping confirm size compatibility. Industry testing published by the U.S. National Highway Traffic Safety Administration shows that underinflation increases tire heat and handling risks, although its data covers pneumatic tires broadly. There is no perfect tube. Choose the material and construction that fit your roads, load, repair habits, and willingness to check pressure.
Install and Inspect the Inner Tube Safely
Choosing the right inner tube starts with exact measurements. Read the tire’s sidewall, then match its diameter and width range. A tube that is too narrow may stretch thin. One that is too wide can fold inside the tire. Match the valve type and length, too. The rim hole must support it without forcing the valve sideways.
ETRTO technical guidance supports using compatible tire and rim dimensions, rather than relying on appearance alone.
Install it in a clean, bright workspace. Remove the tire carefully and inspect the casing with your fingertips. Tiny glass shards can remain hidden. I still miss them sometimes. Check the rim tape for splits, exposed spoke holes, or movement.
Add only a small amount of air to the tube before fitting it. This gives the tube a round shape without creating a hard, trapped fold. Place the valve straight, then work the tire bead inward by hand. Avoid tire levers near the tube.
Inflate gradually and inspect both sidewalls. Look for a raised section, pinched rubber, or a valve leaning sharply. Stop immediately if anything appears uneven.
NHTSA reports approximately 11,000 tire-related crashes annually in the United States, with 738 deaths recorded in 2017. That data concerns vehicle tires, but it reinforces a practical point: pressure and inspection deserve attention.
Use the tire’s recommended pressure range, not the tube’s maximum rating alone. After installation, rotate the wheel slowly and listen for rubbing. A short test ride helps, but it is not proof of perfect installation. Recheck pressure the next day.